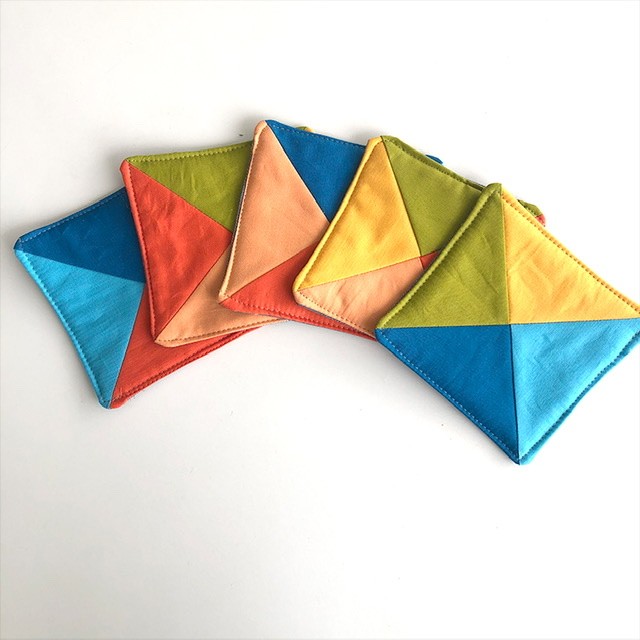
This is a tutorial for making a useful quilted coaster. This small project is ideal for a short summer project or a sweet hostess gift.
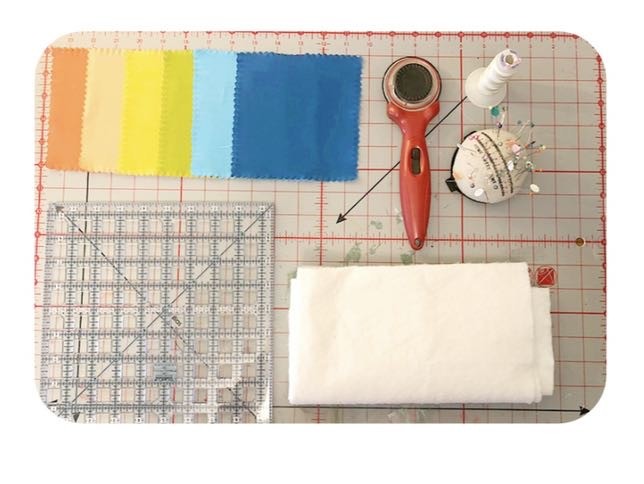
What you will need
– 6 squares of batting of 4 ½”
– 6 squares of color fabric of 5”
– 6 squares of denim
– Rotary cutter
– Cutting mat
– Quilting ruler
– Pins
– Scissors
– Sewing machine
– Walking foot and ¼” foot
Step 1:
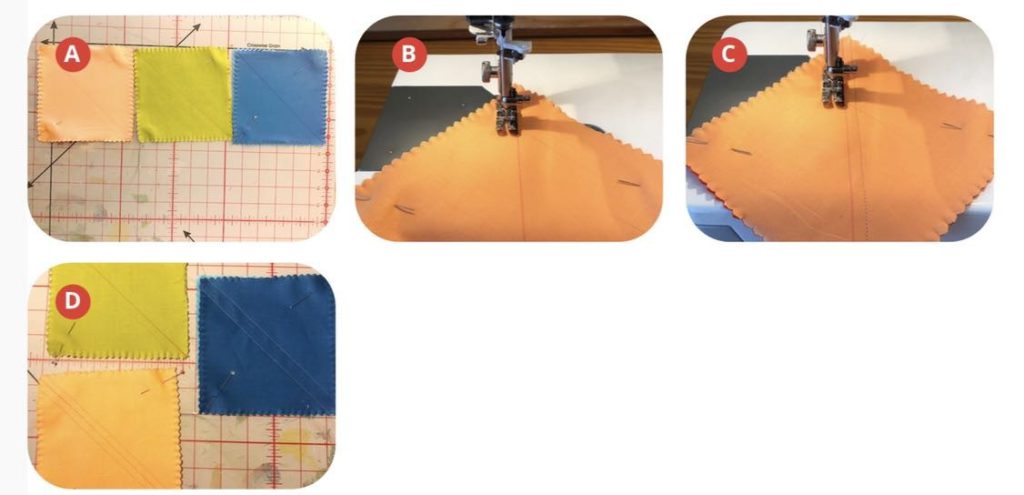
Put two squares of color fabric right sides together. Draw a diagonal line (with a pencil) on the wrong side of one of the squares and pin on the opposite corners of the diagonal. Usingyour sewing machine and the ¼” foot, sew on each side of the diagonal at a ¼” distance. Repeat the same process with the other two pairs of color squares.
Step 2:
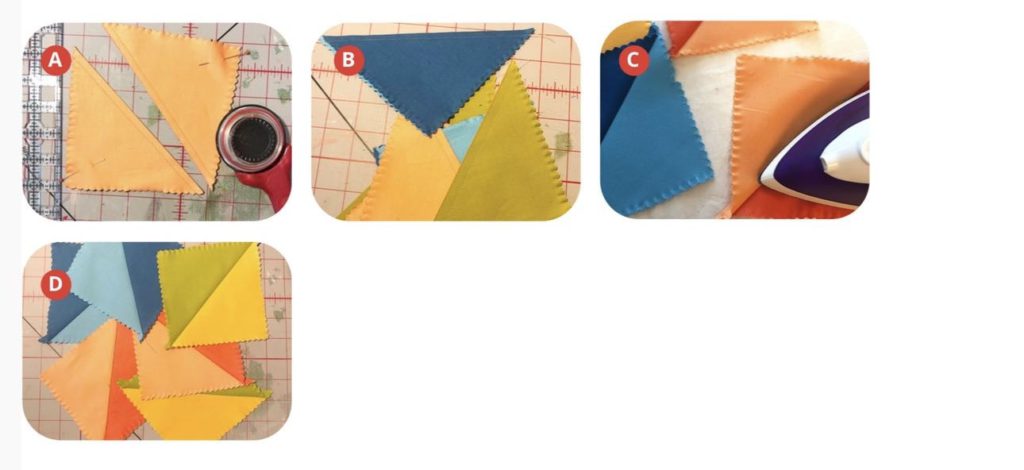
Using the rotary cutter or scissors, cut on the diagonal line you drew earlier. Press the seams to one side. We will now have 6 blocks.
Step 3:
Combine 3 pairs of squares again. Putting them right sides together, make sure that the seams on the diagonals match. Pin on the diagonal seam and draw a diagonal line with a pencil on the wrong side of one of the blocks. This diagonal line must go across the previous diagonal line.

Step 4:
Using your sewing machine and the ¼” foot, sew on each side of the diagonal line a seam at a ¼” distance. Repeat for the other two pairs of squares.
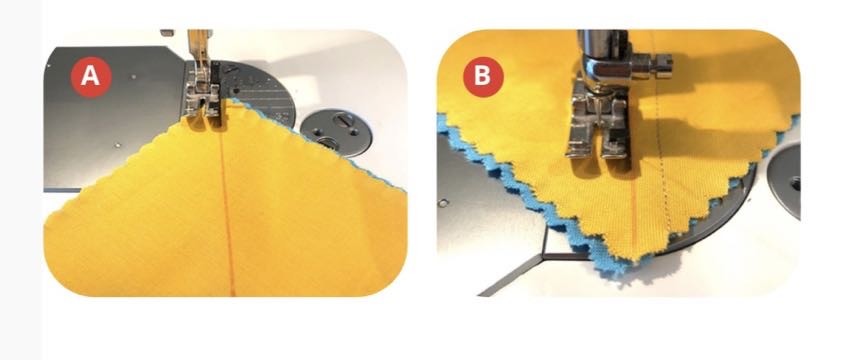
Step 5:
Using the rotary cutter or scissors, cut on the diagonal line you made earlier. Press the seams open. We will now have 6 blocks.
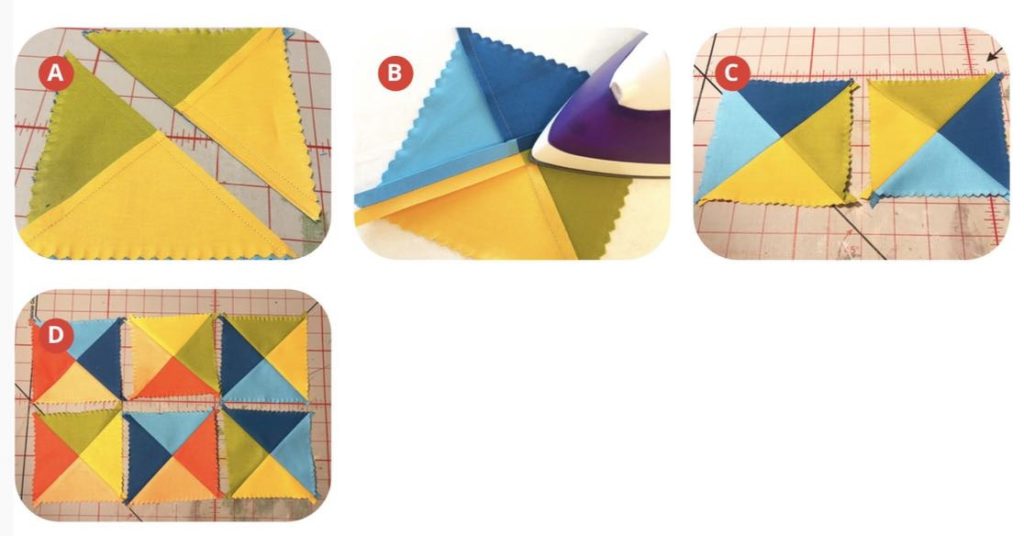
Step 6:
Now you will make the 6 coasters: set the block on a square of batting, right side up. Then, add a square of denim on top, right sides together. Pin all around.
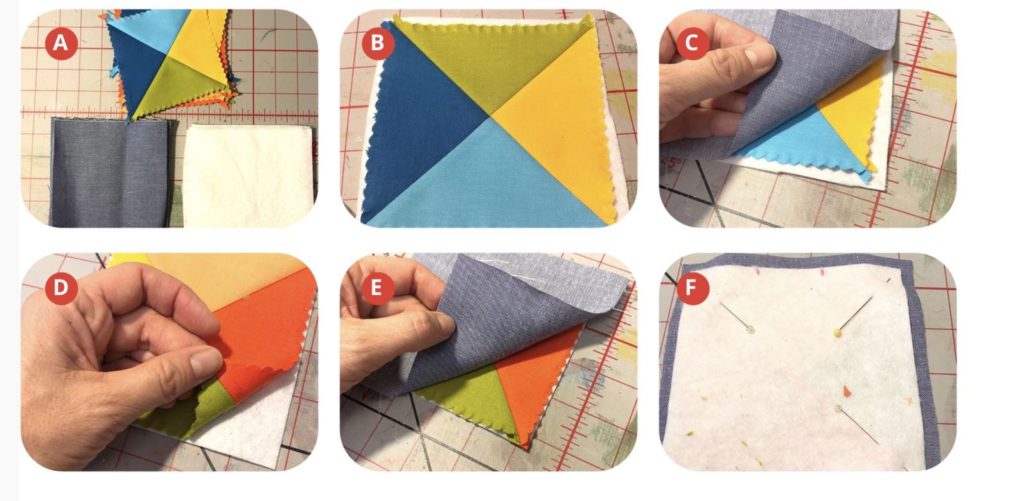
Step 7:
Sew all around the coaster, leaving a 2” opening to turn the coaster right side out.
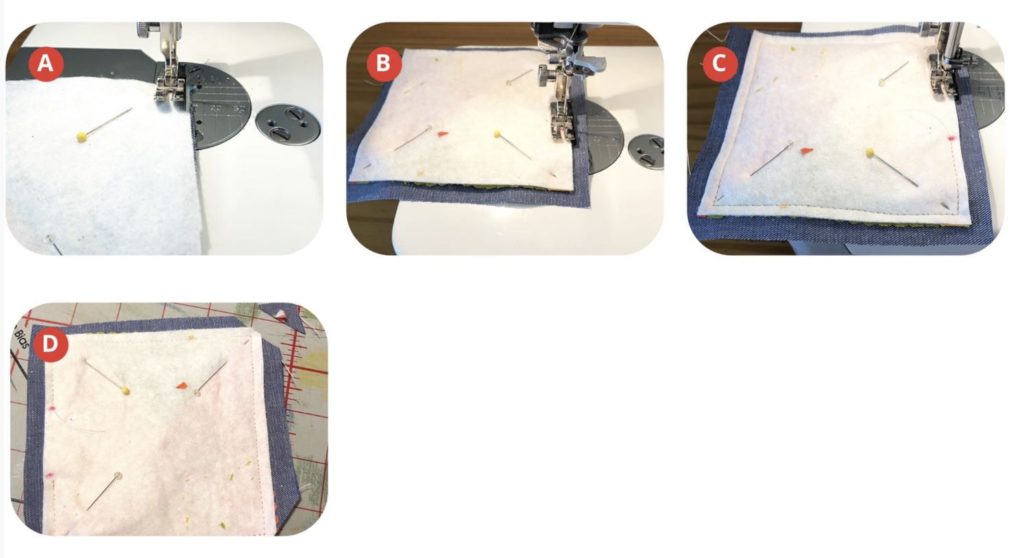
Step 8:
Turn the coaster right side out, press well and close the opening with pins. Topstitch all around, to close and finish
the coaster.

Ready!
Repeat these steps 5 more times to finish the set of 6 coasters. Enjoy!


For more interesting tutorials visit this post
